Overview
This guide walks you through how to create a new advertising campaign on SmartAds, including campaign setup and ad creation. Whether you are launching your first campaign or testing a new approach, configuring the right parameters based on your objectives will help you track performance more effectively and optimize your budget. At the same time, the system can collect essential data to improve ad delivery efficiency in later stages.
Overview of Advertising Levels in the SmartAds Management System
Currently, SmartAds operates with two main advertising levels:
-
Campaign level: This is where you define campaign objectives, select target audiences, configure budgets, schedules, and ad placements.
-
Ad (Creative) level: This is where you add specific ad assets, including image or video formats, headlines, descriptions, call-to-action (CTA) buttons, and destination URLs.
Preparing Your Advertising Account Before Getting Started
Before creating a campaign, you need to complete several basic account setup steps on SmartAds:
Step 1. Update your profile
If this is your first time using SmartAds, go to the "Profile" section to complete the required setup, including personal information, advertising licenses, and business verification.
Step 2. Add funds
You need to top up your account balance before running a campaign. SmartAds currently supports multiple payment methods such as bank transfer, credit card, and e-wallets. Make sure all payment details are accurate to avoid campaign interruptions.
If your account balance is insufficient, you can still preview ads and save campaigns as drafts; however, the ads will not be delivered until sufficient funds are available.
Step 3. Review compliance requirements
SmartAds enforces advertising policies related to ad content, images, videos, destination links, target age, and required licenses. Before launching, make sure you review the "Advertising Regulations" section and comply with all requirements to avoid ad rejection.
How to Set Up an Advertising Campaign on SmartAds (Updated December 2025)
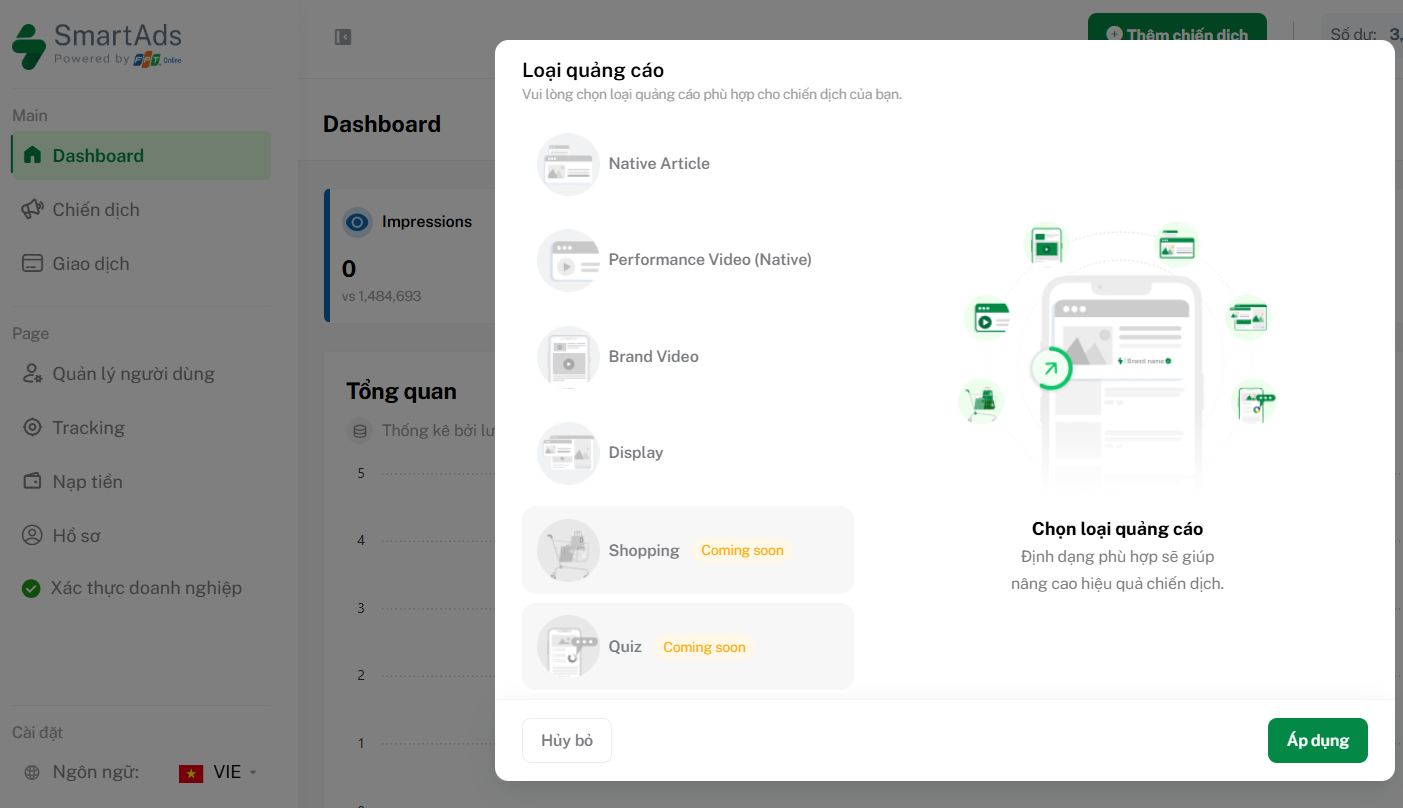
Step 1: Choose an ad format
After completing your account setup, click the ![]() button to select an ad format. Currently, SmartAds offers four main formats:
button to select an ad format. Currently, SmartAds offers four main formats:
-
Native Article Ads: Ads that appear as editorial-style articles, combining images and content, seamlessly embedded within news feeds.
-
Performance Video Ads (Native): Video ads displayed in-feed like articles. After the video ends, a static banner appears to reinforce brand recall and engagement.
-
Brand Video Ads: Autoplay video ads displayed outside the main content area, such as within articles or alongside page layouts.
-
Display Ads: Banner-based advertising formats designed to reach potential customers through visually rich creatives. In addition to standard static banners, you can also upload HTML5 files to run dynamic, interactive banner ads.
>>> Learn more about HTML5 banner formats here.
Once this step is completed, the system will automatically redirect you to the campaign setup page.
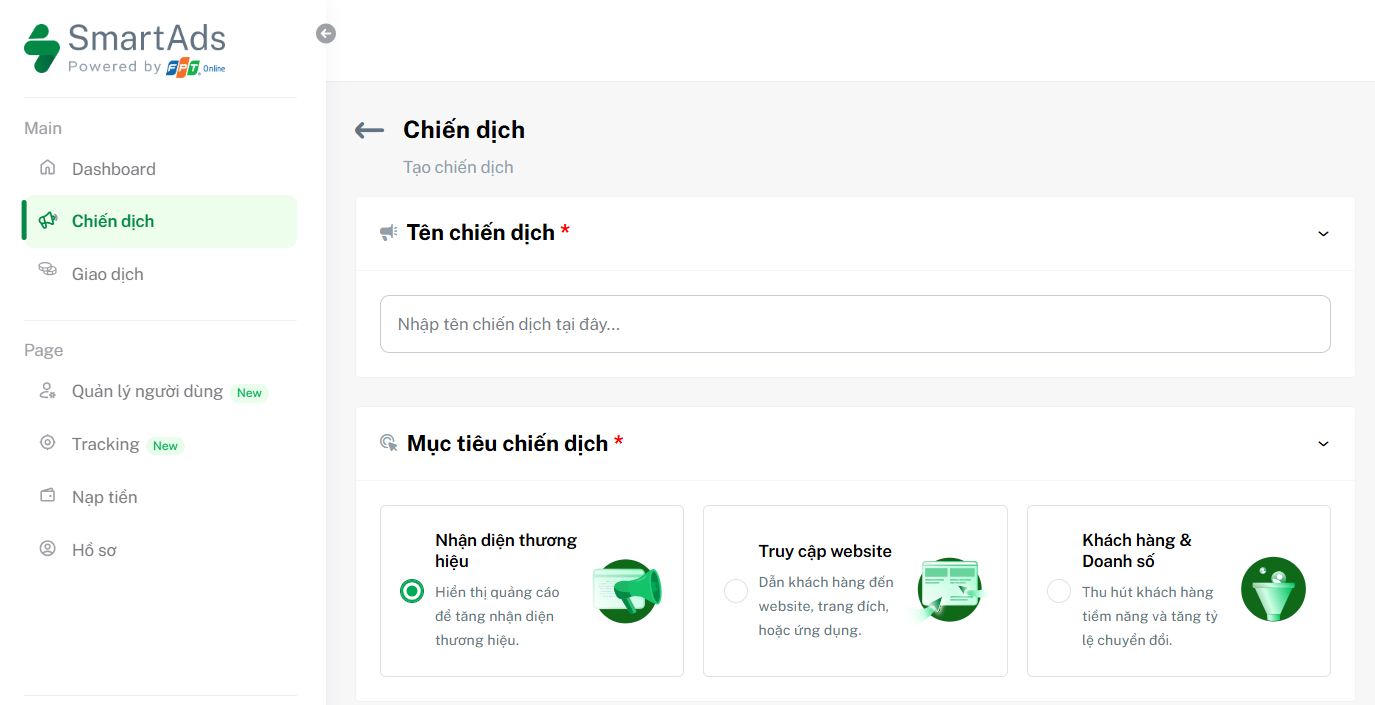
Step 2: Enter the campaign name and select objectives
This is a required field. Choose a clear and descriptive name to make campaign management easier later on.
Tip: Include information such as product/service, objective, timeline, or channel.
Examples:
-
Awareness_CPM_Mass_Allsite_072025
-
Conversion_CPC_Retarget_Contextual_072025

For Campaign Objectives, you can choose one of the following options depending on your goals:
-
Brand Awareness: Maximize ad visibility to increase brand recognition.
-
Website Traffic: Drive users to your website, landing page, or application.
-
Leads & Conversions: Attract potential customers or optimize for conversion actions.
Step 3. Set up Creatives
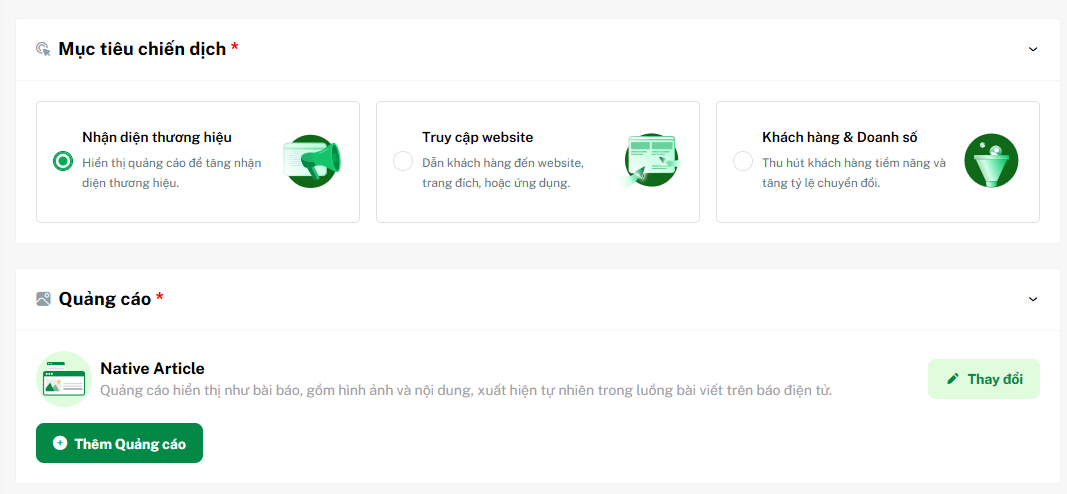
Click the ![]() button to open the creative setup interface. Here, you need to provide all required ad assets:
button to open the creative setup interface. Here, you need to provide all required ad assets:
-
Destination URL: Enter the website, landing page, or app link you want users to visit.
-
Headline and description: Write concise, compelling copy. You can use the SmartAds AI tool via the
 button to generate headline suggestions aligned with your content and campaign objectives. This asset is required to Native Article Ads and Performance Video Ads. However, for Brand Video Ads, this is optional.
 -
Images or videos: Upload assets that meet the required aspect ratios to ensure proper display and optimal performance. Refer to the guidelines here for details.
-
Call to Action (CTA): Select an appropriate CTA such as “Learn more”, “View now”, “Sign up”, etc.
-
Tracking links (optional): You may add UTM parameters or tracking codes to measure campaign performance more precisely via third-party analytics tools.
>>> Learn more about UTM setup and SmartAds pixel tracking here.
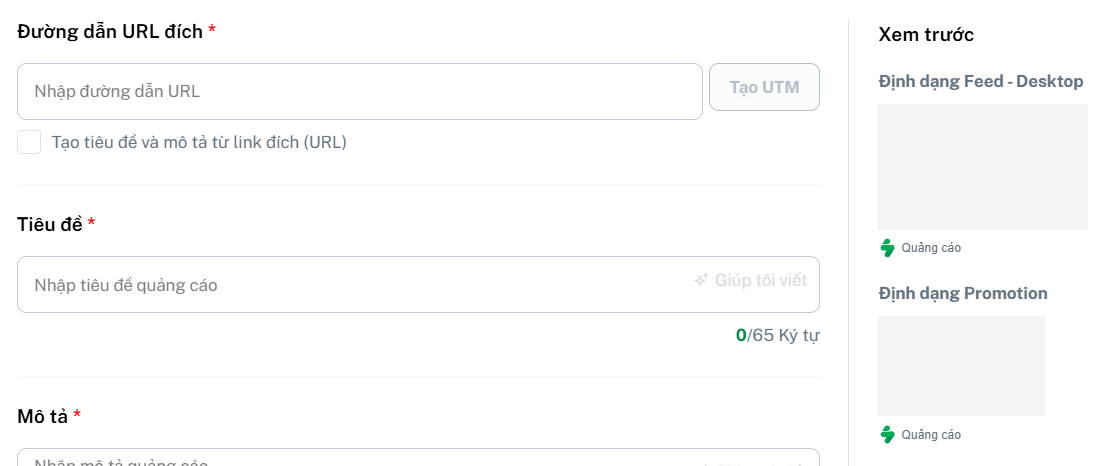
Once all required fields are completed, a live preview will appear on the right panel, allowing you to review how your ad will look before saving and launching. Make sure all visuals and content display correctly to ensure the best user experience.
After finishing the setup, click ![]() to save before moving to the next step.
to save before moving to the next step.
Step 4. Define targeting
At this stage, you define how your ads will be distributed by selecting appropriate targeting criteria. Proper targeting not only improves campaign performance but also helps optimize advertising costs. SmartAds currently supports several flexible targeting options, including:
-
Contextual Targeting: Allows ads to appear within content that matches relevant topics. You can select one or multiple suggested categories to ensure your ads appear in contexts aligned with user intent.
-
Behavioral Targeting: Targets users based on reading and browsing behavior to improve reach efficiency. A 15% bid increase is applied to optimize delivery performance.
-
Retargeting: Re-engages users who have previously interacted with your campaigns. When enabled, a 15% bid adjustment is applied.
In addition to the main targeting options above, you also need to configure the following:
-
Demographics: Filter audiences by age range or gender to better match your target customer profile.
-
Geographic location: Select the country or specific provinces/cities where your ads will be delivered. This is a required field and directly impacts ad reach.
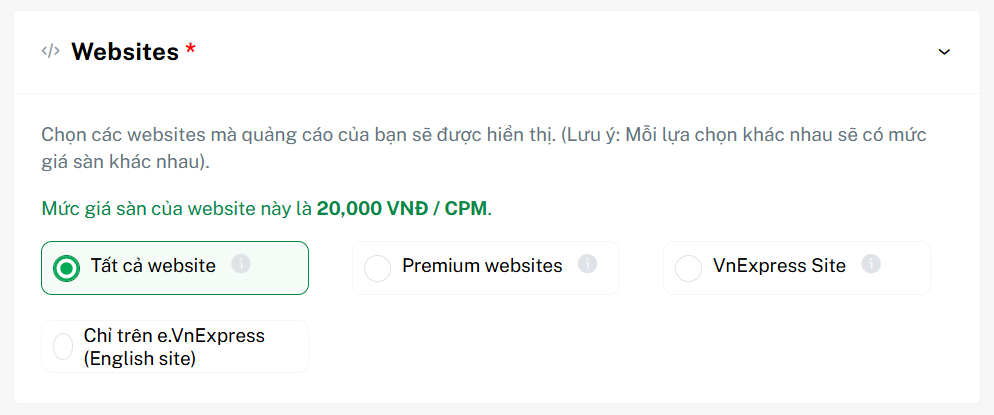
-
Websites (Publishers): Choose the websites where your ads will appear. Each option comes with a different base price. SmartAds currently provides four main publisher packages, as shown below:
-
Platforms & Operating Systems: Select device types (mobile, desktop, tablet) and operating systems (Android, iOS, Windows, etc.) that best match your audience behavior.
Step 5. Configure budget and schedule
At this step, you will define the pricing model, campaign duration, and total budget.
Pricing models: SmartAds supports two main pricing options:
-
CPM (Cost per Mille): Pay per 1,000 measurable ad impressions.
- CPC (Cost per Click): Pay for each user click on your ad.
Schedule settings:
-
Start date – End date: Select when your campaign begins and ends.
-
Ad delivery time: Set the hours during which ads will run (based on GMT+7, Vietnam time). You may choose full-day delivery (00:00–23:59) or limit delivery to high-conversion time windows.
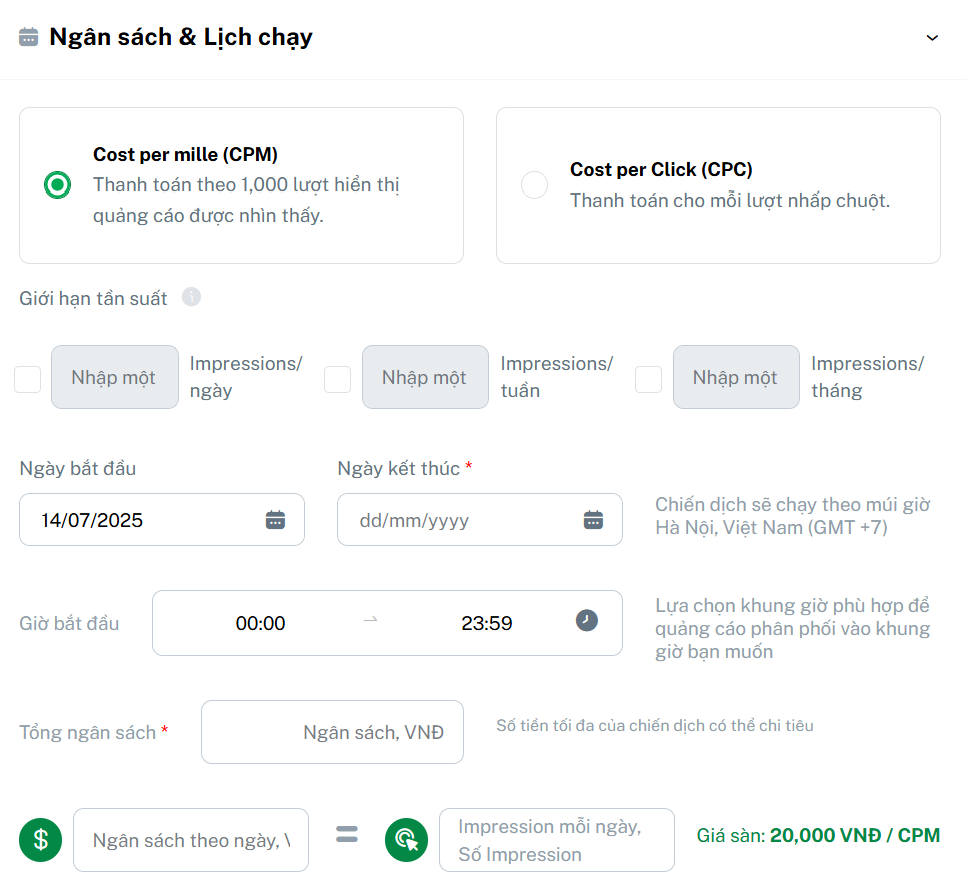
Frequency cap (CPM only): You can limit how many times an ad is shown per user per day, week, or month to avoid repetition and ad fatigue. This feature helps control costs and maintain a positive user experience.
Budget settings:
-
Total budget: Enter the total amount you plan to spend for the entire campaign.
-
Daily budget: The system automatically calculates the average daily spend, or you can manually adjust it.
-
Bid price: You may manually set a bid to increase ad delivery priority and potentially achieve better performance. This step is optional. If no bid is set, the system will apply the default floor price. Actual clicks or impressions may vary depending on budget and delivery performance.

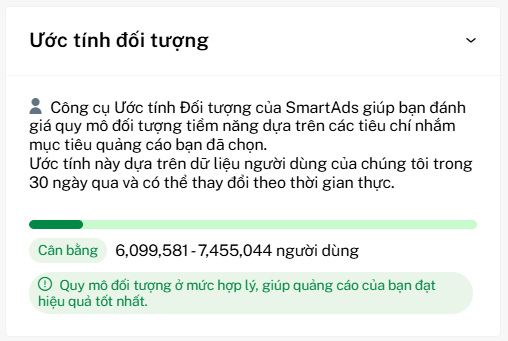
Once all settings are completed, the Estimated Reach panel will automatically appear on the right. This tool helps you forecast the potential audience size based on your targeting criteria over the last 30 days.
Step 6. Upload required advertising licenses
SmartAds advertising policies apply to all campaigns purchased through the system and across partner publisher networks. For certain regulated industries such as healthcare, dietary supplements, or finance and banking, valid licenses are required before ads can be approved and delivered.
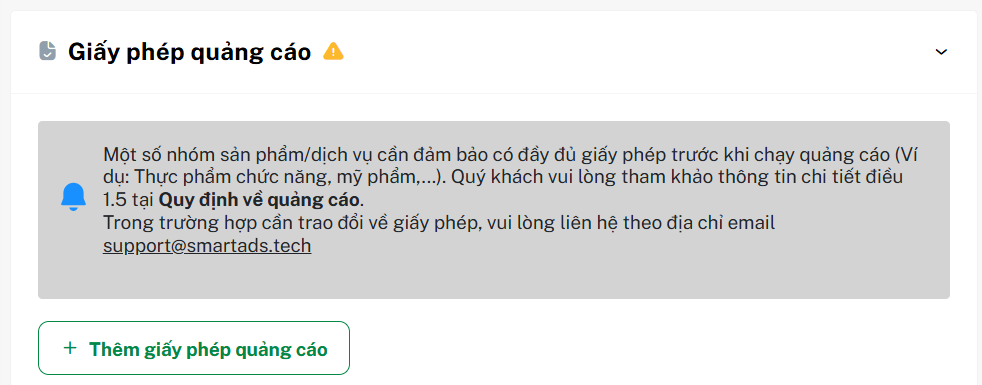
At this step, you need to upload relevant legal documents, such as:
-
Advertising content approval certificates
-
Product circulation or distribution licenses
-
Documents proving product origin (if required)
SmartAds will review and approve your submission before the campaign goes live. See full policy details here.
Click ![]() to save as draft or
to save as draft or ![]() to publish your ad.
to publish your ad.
How to Set Up Tracking Code on SmartAds
Tracking code helps measure campaign performance by tracking conversion actions such as page views, form submissions, purchases, and more, enabling real-time optimization based on data.
To configure tracking, go to the Tracking section and follow these two steps:
Step 1. Install the Pixel
Copy the provided code snippet and paste it inside the
tag of all pages you want to track.
This ensures SmartAds can accurately collect user behavior data for conversion tracking and campaign optimization.
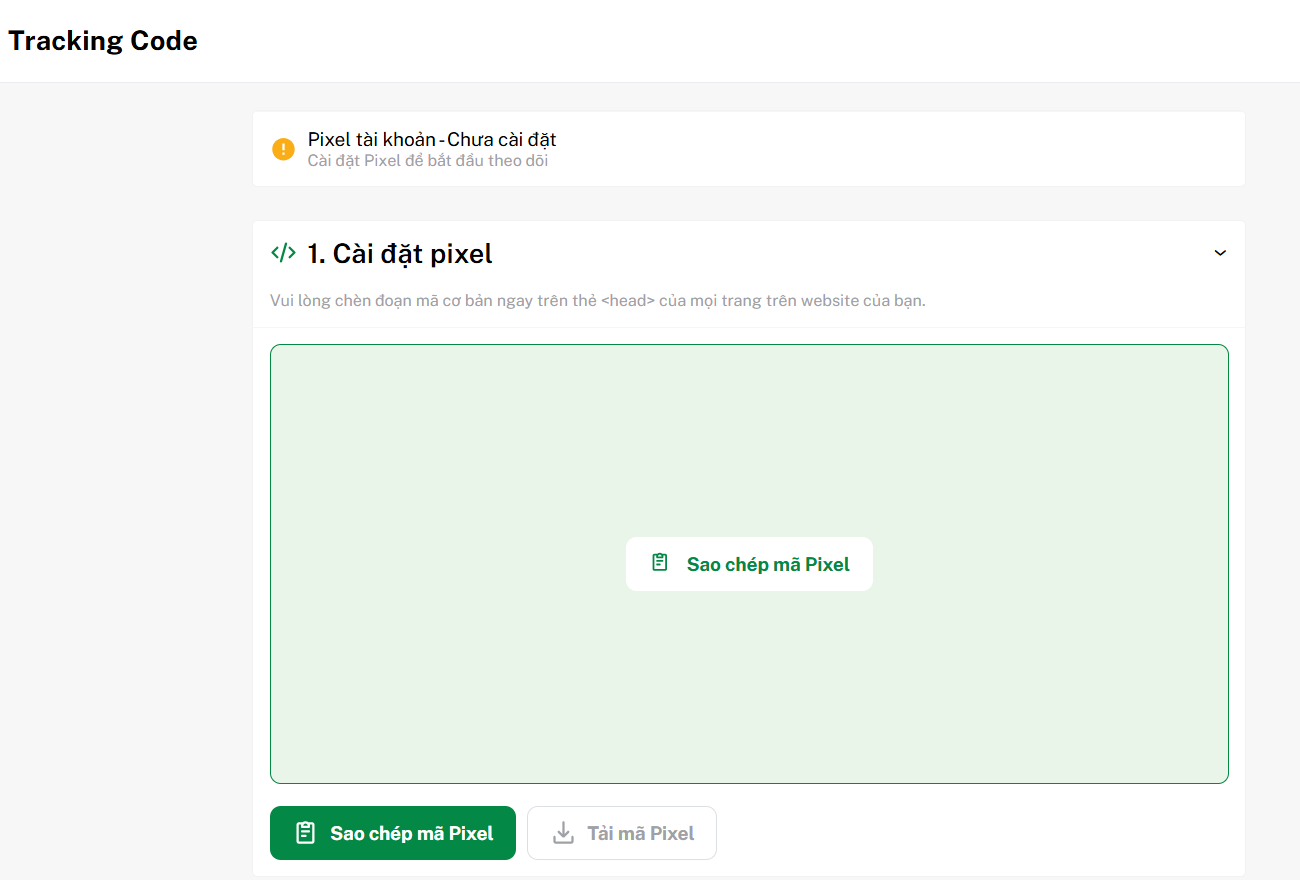
Step 2. Verify the Pixel installation
After installation, you can verify the setup by entering your URL into the SmartAds pixel testing tool. The system will analyze the page and display the activation status so you can confirm whether the pixel has been installed correctly.

If installed successfully, the system will display the message: "Tracking code has been successfully installed on your website."